Installing Your Acrylic Board
Which hardware did you get?
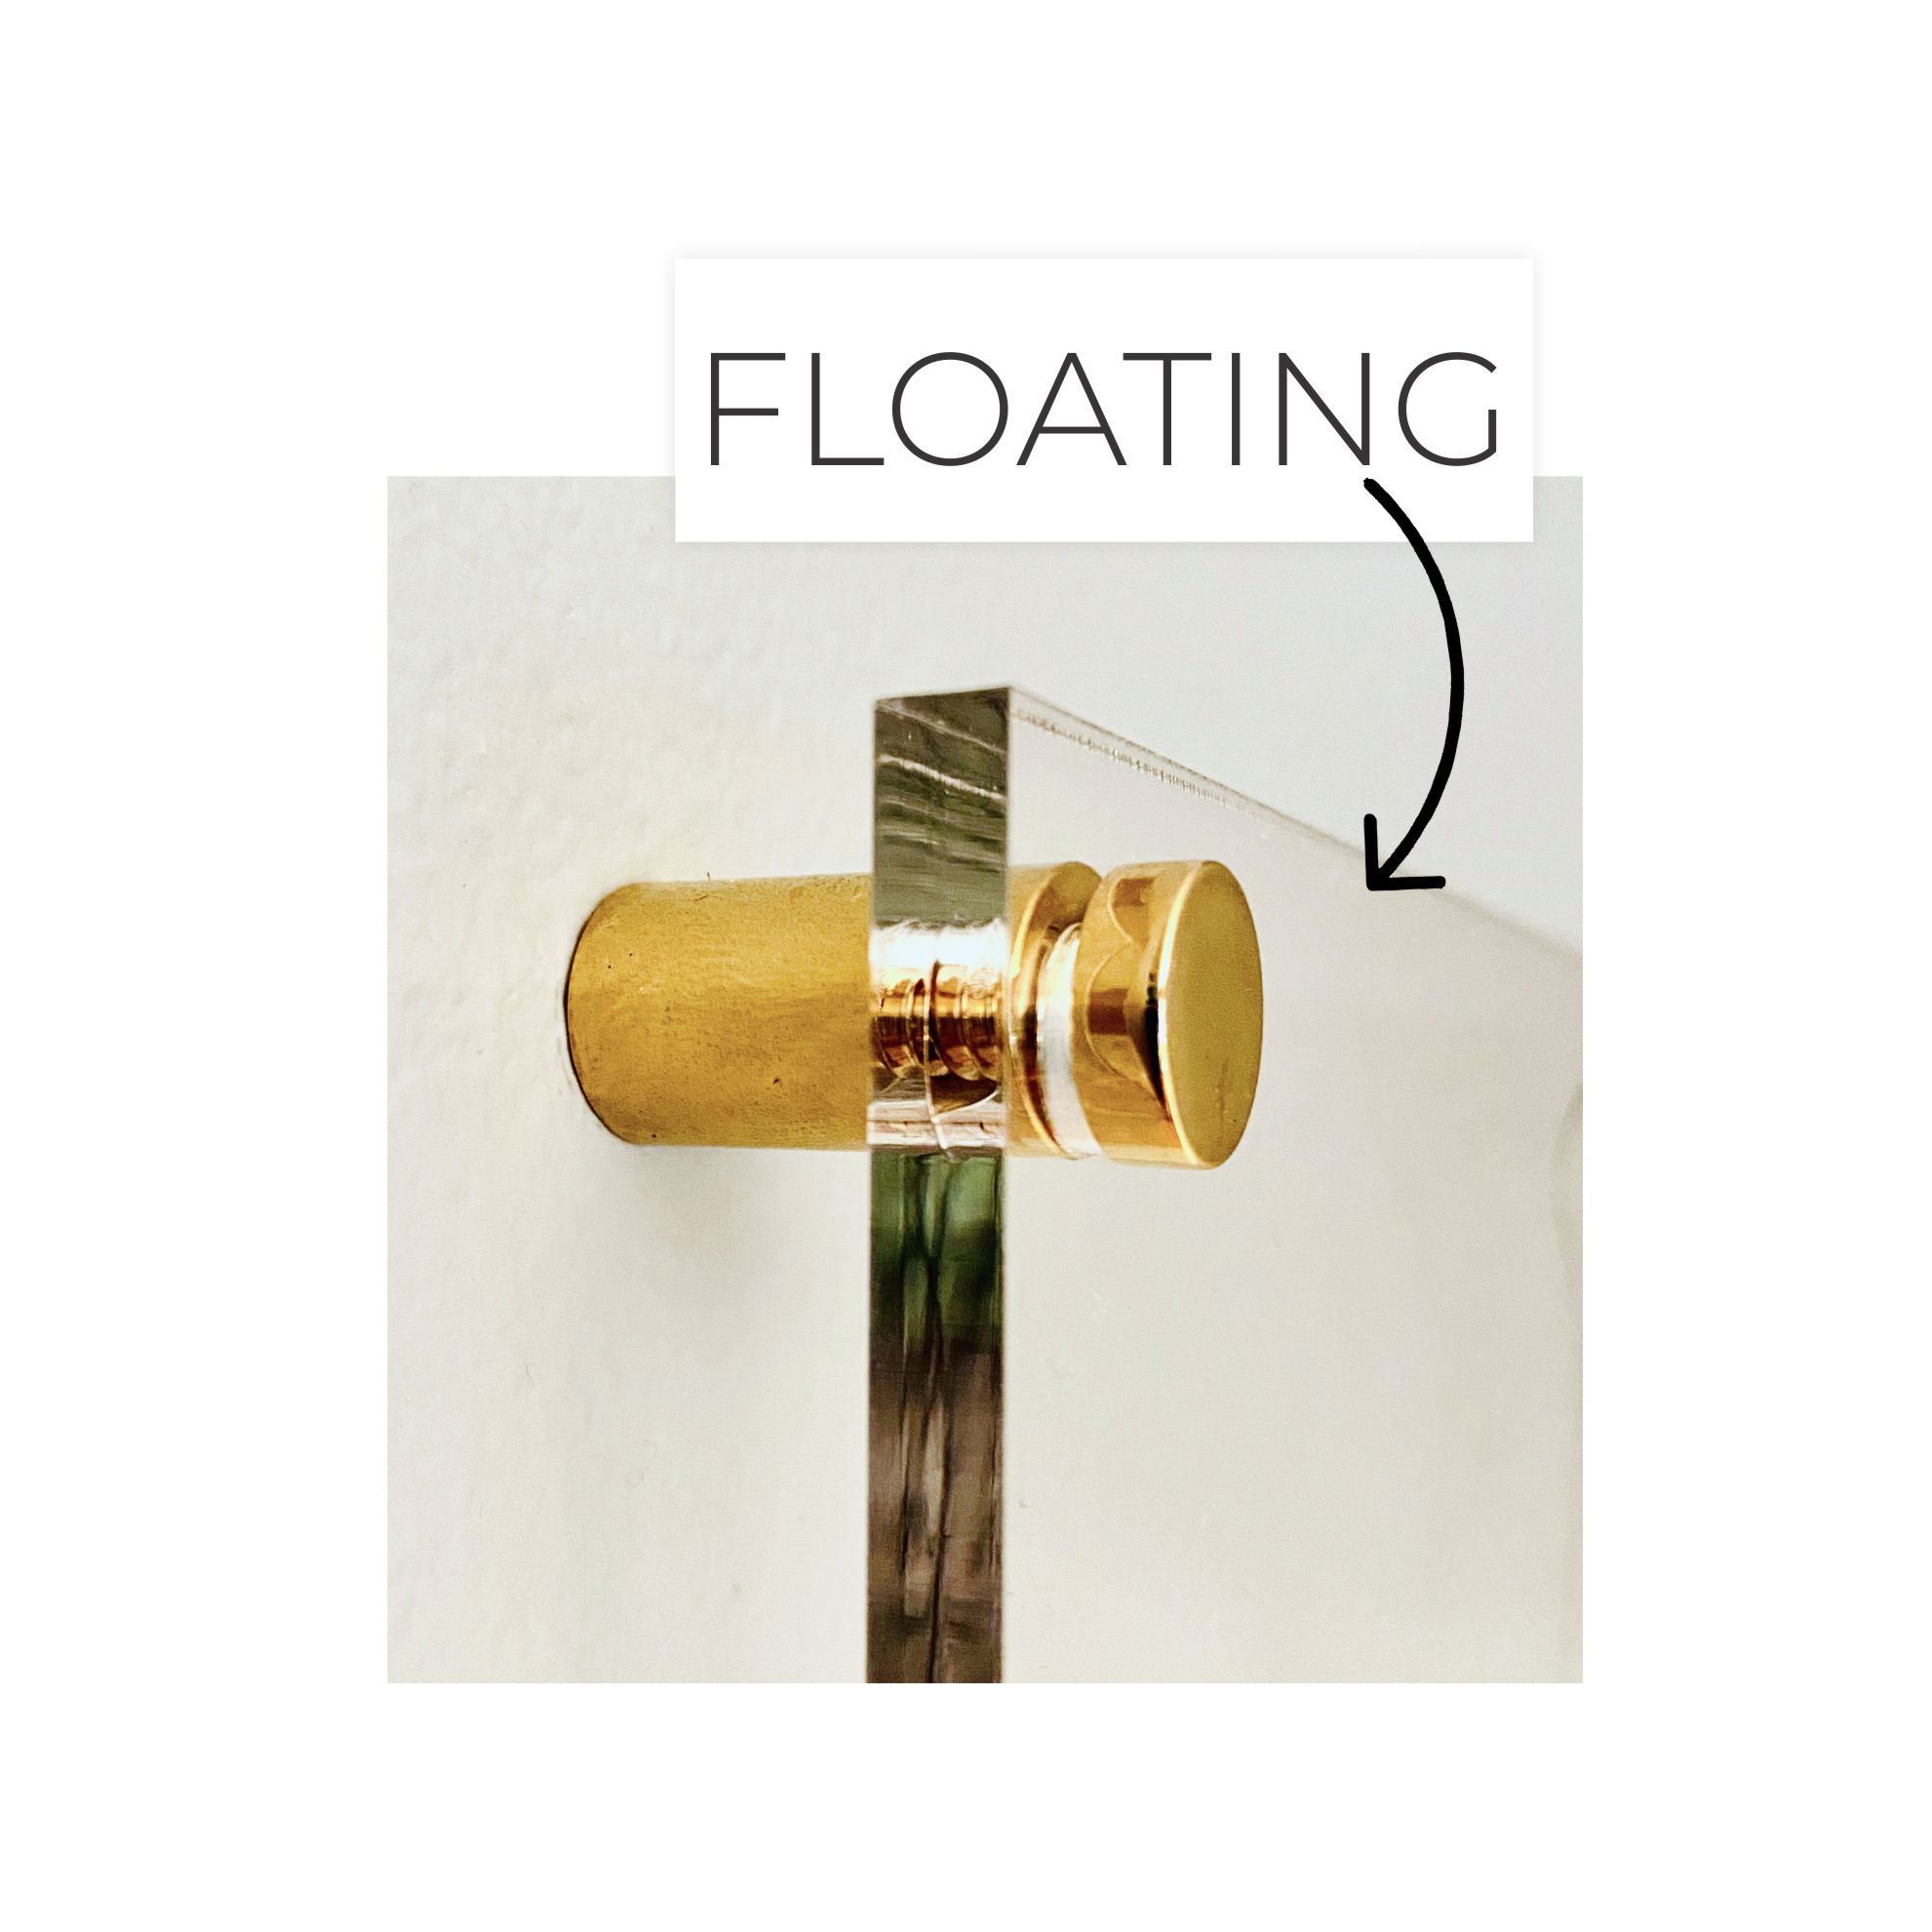
Floating Standoff Installation Instructions
•What you’ll need:
– Standard Size #2 Phillips Screwdriver
– Pencil or Pen
– Measuring Tape
– Level
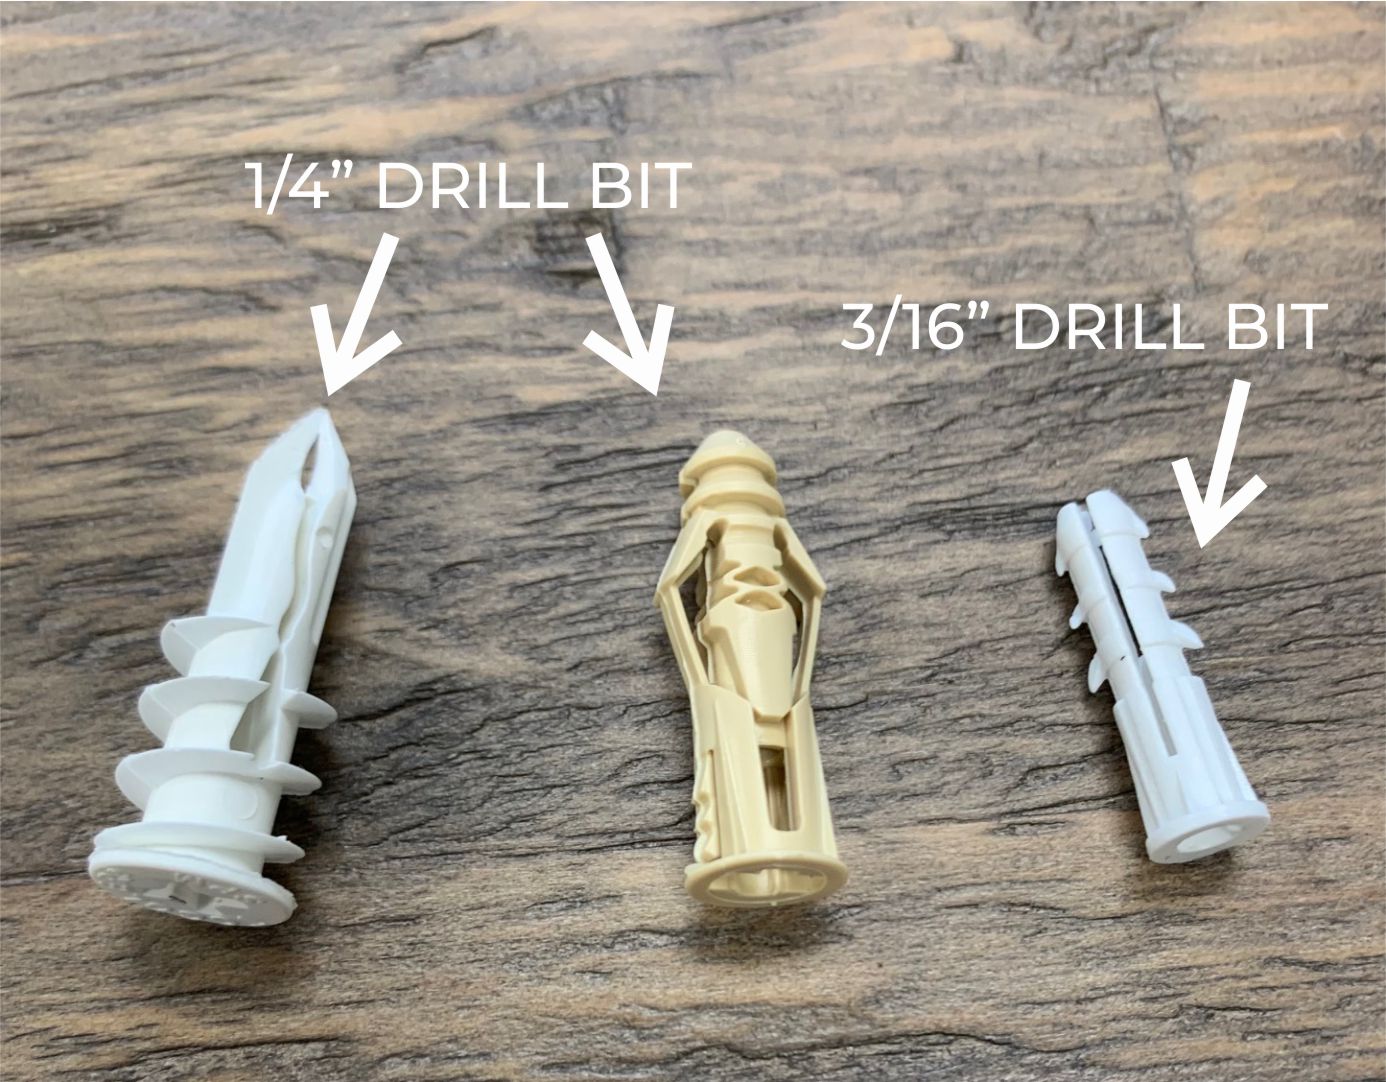
– Power Drill + Appropriate Size Drill Bit For Your Anchor Style (See photo below for size guide!)
Video Instructions:
1. Remove the protective film from your board and get the hardware ready. Once you remove the protective film be extremely careful of setting the board down, acrylic can easily scratch. We recommend having a towel or something soft nearby to set it down on if needed.
2. Mark where you would like the board on the wall. Use the level to straighten and the pencil to mark your holes. Be very careful not to scratch or rub the acrylic against the wall, this could lead to scratching your board.
3. Using your power drill and the bit size for your anchor, drill a hole into each spot you marked
4. Carefully drill or push each anchor into the holes.
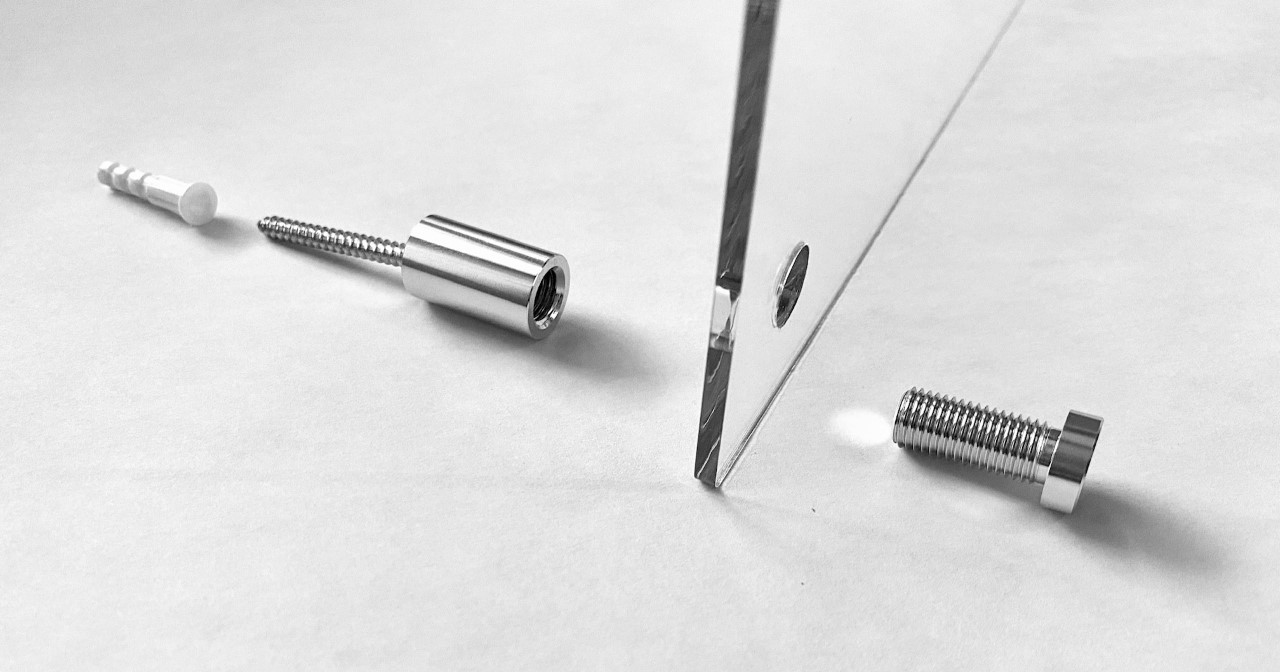
5. Screw the bottom portion of each standoff into each anchor. Be very careful not to damage the threads in the standoff during this process or the cap will be difficult to screw on.
6. Align the board with the standoffs and screw each cap on.
Now your board is ready to use! Check out these pages for Marker Recommendations and Cleaning Tips
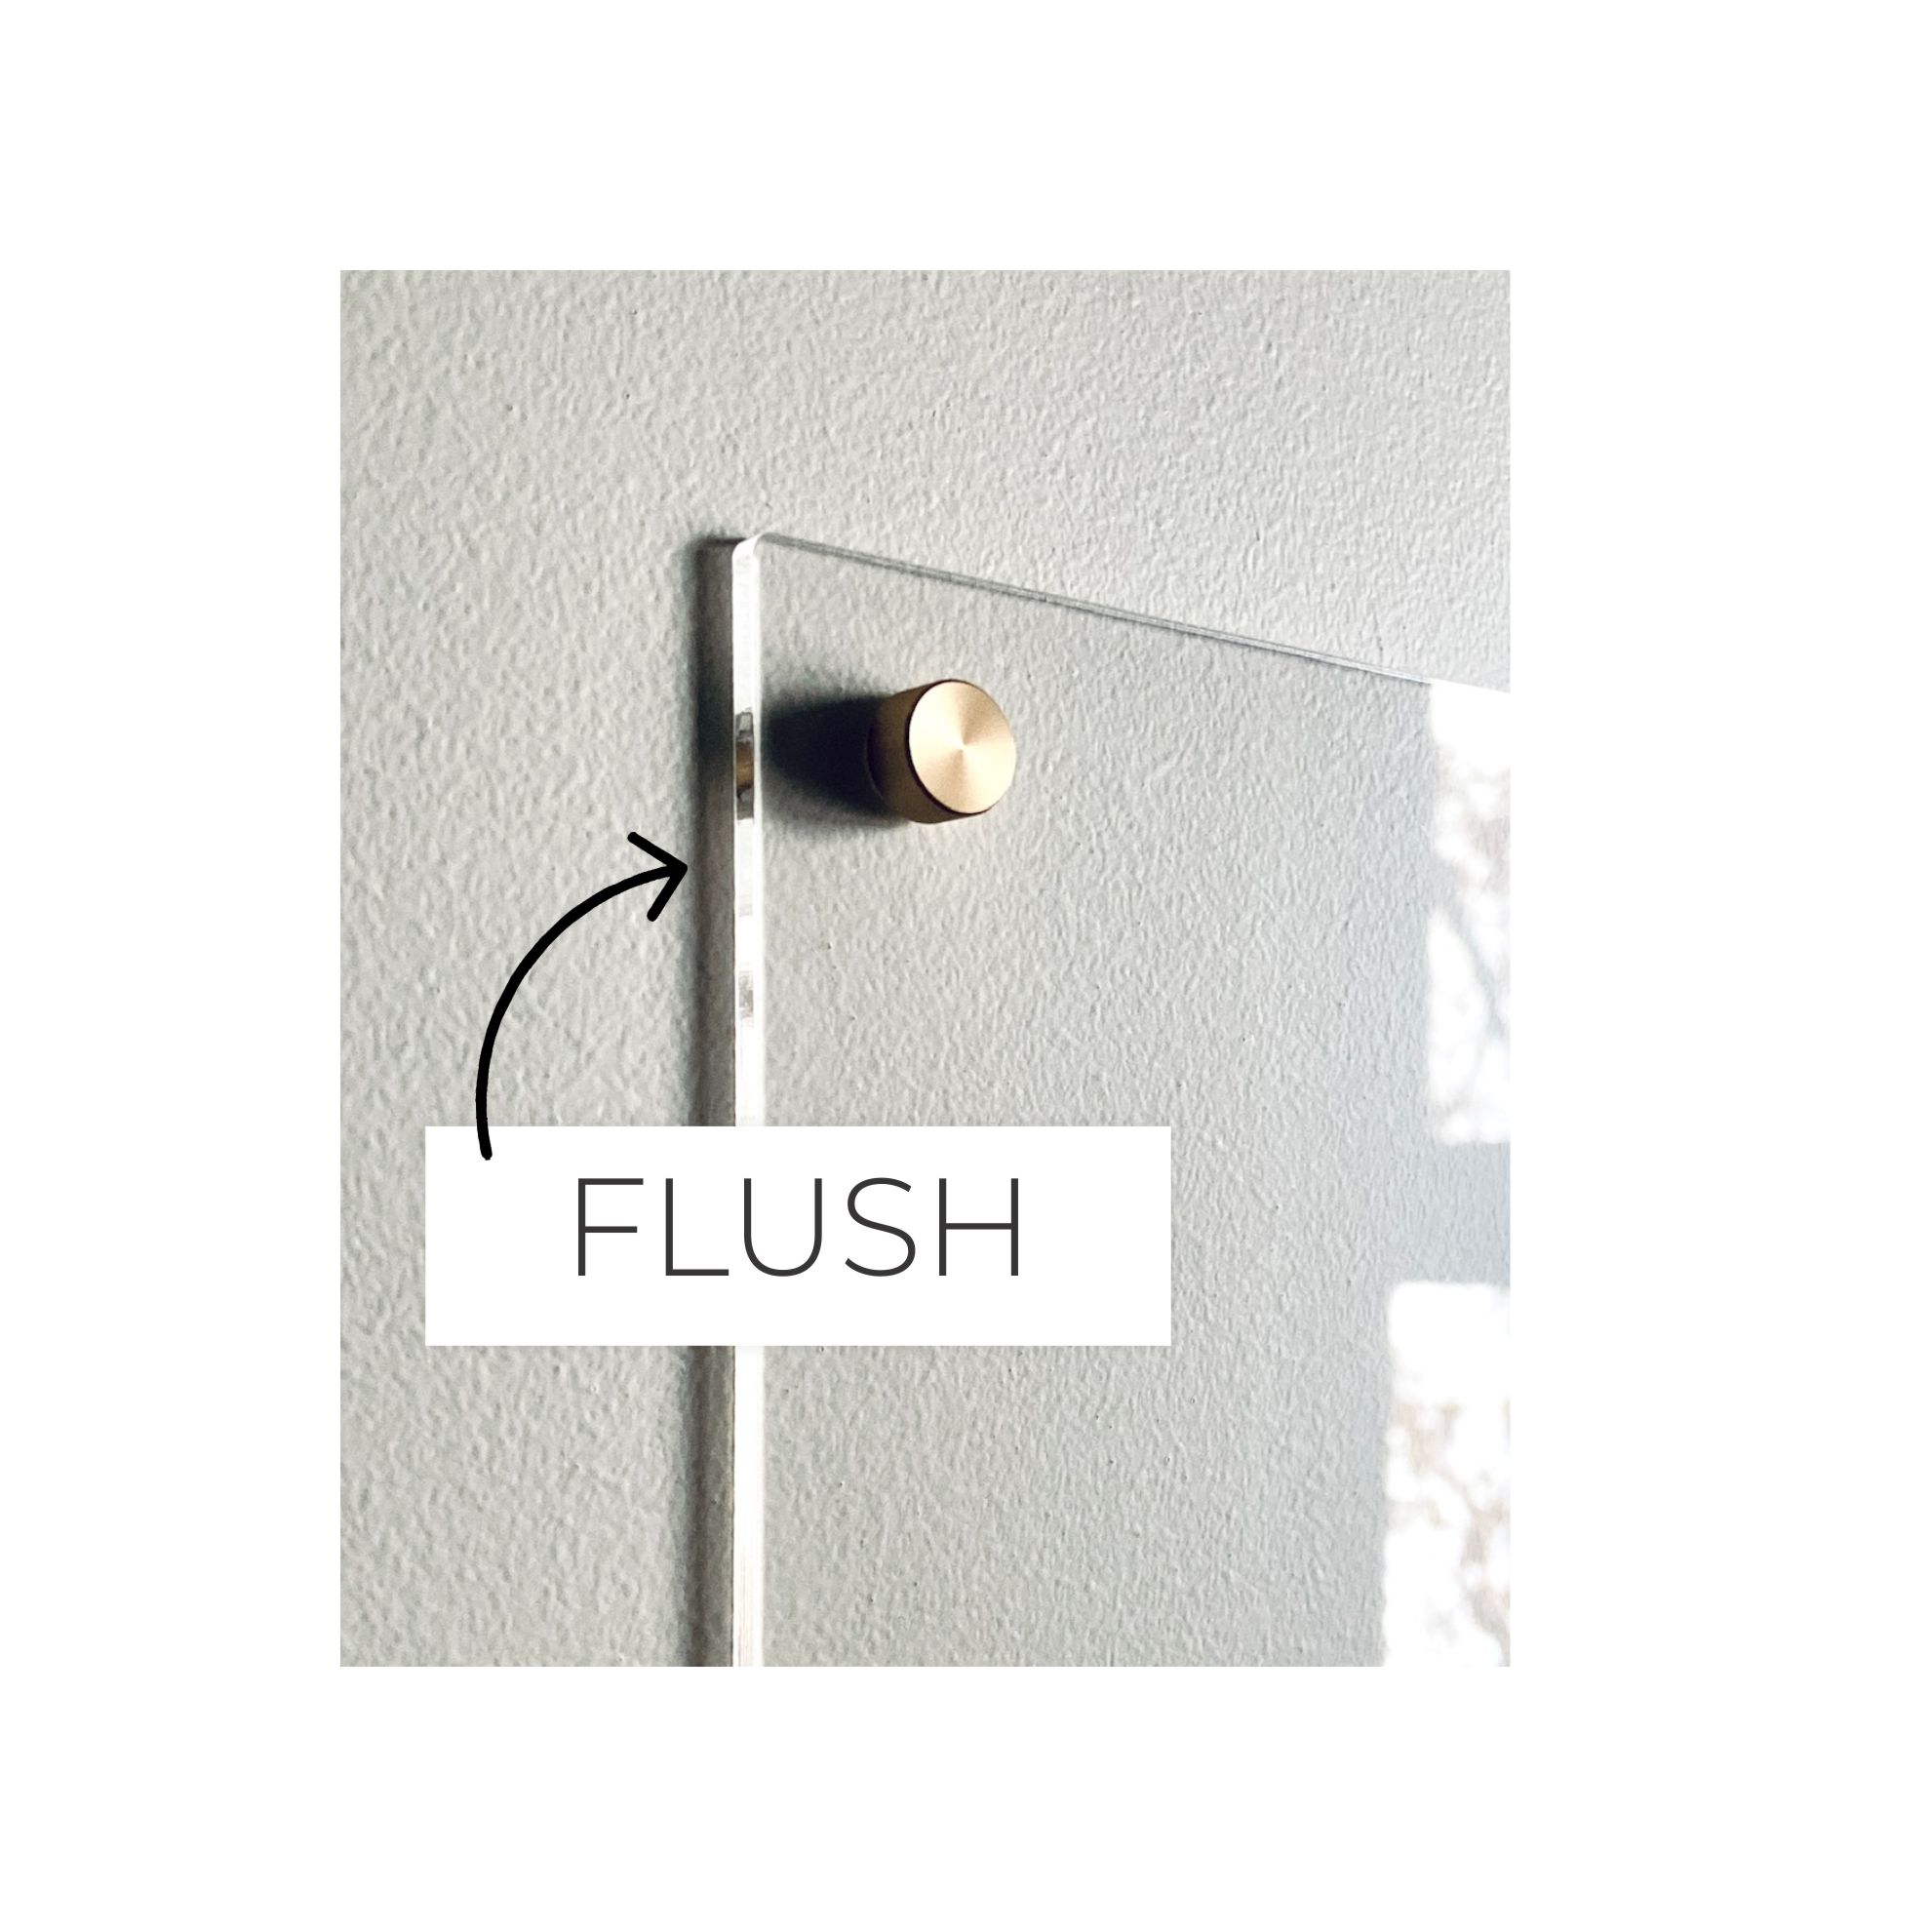
Flush Standoff Installation Instructions
•What you’ll need:
– Standard Size #2 Phillips Screwdriver
– Pencil or Pen
– Measuring Tape
– Level
– Power Drill + Appropriate Size Drill Bit For Your Anchor Style (See photo below for size guide!)
Video Instructions:
1. Remove the protective film from your board and get the hardware ready. Once you remove the protective film be extremely careful of setting the board down, acrylic can easily scratch. We recommend having a towel or something soft nearby to set it down on if needed.
2. Mark where you would like the board on the wall. Use the level to straighten and the pencil to mark your holes. Be very careful not to scratch or rub the acrylic against the wall, this could lead to scratching your board. Acrylic is delicate and prone to scratching, treat it the same as a mirror or glass.
3. Using your power drill and the bit size for your anchor, drill a hole into each spot you marked.
4. Carefully drill or push each anchor into the holes.
5. Align the board to the anchors on the wall.
6. Place the screw threw the circle thread and screw into each anchor.
7. Screw the cap onto each thread.
Now your board is ready to use! Check out these pages for Marker Recommendations and Cleaning Tips
{keywords: hanging instructions mounting installing drill bit install help drilling installation instructions }